Getting started
An overview of DNR Bootstrap, how to download and use, basic templates and examples, and more.
An overview of DNR Bootstrap, how to download and use, basic templates and examples, and more.
DNR Bootstrap (currently v3.33.0) has a few easy ways to quickly get started, each one appealing to a different skill level and use case. Read through to see what suits your particular needs.
Source Sass, JavaScript, and font files, along with our docs. Requires a Sass compiler and some setup.
For immediate integration in your project we have a CDN hosted minified CSS file available
<!-- Latest compiled and minified CSS -->
<link rel="stylesheet" href="https://bootstrap-acc.dnr.persgroep.net/dist/css/dnr-bootstrap.min.css">If for some reason you still need an older version of our Bootstrap you can find them here:
DNR Bootstrap uses Autoprefixer to deal with CSS vendor prefixes. If you're compiling Bootstrap from its Sass source and not using our Gulpfile, you'll need to integrate Autoprefixer into your build process yourself. If you're using precompiled Bootstrap or using our Gulpfile, you don't need to worry about this because Autoprefixer is already integrated into our Gulpfile.
All DPP projects are subject to the Frontend Guild Guidelines and coding standards. To maintain code consistency you have to install scss-lint and Ruby.
$ gem install scss_lintNext, the Gulp plugin Gulp scss-lint for scss-lint is installed automatically through the devdependencies in package.json
DNR Bootstrap is downloadable in two forms, within which you'll find the following directories and files, logically grouping common resources and providing both compiled and minified variations.
Please note that all JavaScript plugins require jQuery to be included, as shown in the starter template. Consult our bower.json to see which versions of jQuery are supported.
Once downloaded, unzip the compressed folder to see the structure of (the compiled) Bootstrap. You'll see something like this:
dnr-bootstrap/
├── css/
│   ├── dnr-bootstrap.css
│   ├── dnr-bootstrap.min.css
├── js/
│   ├── bootstrap.js
│   └── bootstrap.min.js
├── fonts/
│   ├── fontawesome-webfont.eot
│   ├── fontawesome-webfont.svg
│   ├── fontawesome-webfont.ttf
│   ├── fontawesome-webfont.woff
│   └── fontawesome-webfont.woff2
└── img/
This is the most basic form of Bootstrap: precompiled files for quick drop-in usage in nearly any web project. We provide compiled CSS and JS (dnr-bootstrap.*), as well as compiled and minified CSS and JS (dnr-bootstrap.min.*). Fonts from Font Awesome are included.
Bootstrap uses Gulp for its build system, with convenient methods for working with the framework. It's how we compile our code, run tests, and more.
To install Gulp, you must first download and install node.js (which includes npm). npm stands for node packaged modules and is a way to manage development dependencies through node.js.
Then, from the command line:gulp-cli globally with npm install --global gulp-cli./bootstrap/ directory, then run npm install. npm will look at the package.json file and automatically install the necessary local dependencies listed there.When completed, you'll be able to run the various Grunt commands provided from the command line.
gulp [env] (Just compile CSS, JavaScript, fonts and images)Regenerates the /dist/ and /assets/ directory with compiled and minified CSS and JavaScript files, fonts and images. As a Bootstrap user, this is normally the command you want.
# prepping everything for deploy to DEV
$ gulp dev

# prepping everything for deploy to TEST
$ gulp test

# prepping everything for deploy to ACC
$ gulp acc

# prepping everything for deploy to PROD
$ gulp build
Now merge your code into the deploy branch, push to remote and open Jenkins and check which environments you wish to deploy.
gulp (Local development)Compiles and minifies CSS and JavaScript, builds the documentation website, regenerates the Customizer assets, and more. Requires Jekyll. Usually only necessary if you're writing docs or implementing new modules on DNR Bootstrap itself.
Should you encounter problems with installing dependencies or running Gulp commands, first delete the /node_modules/ directory generated by npm. Then, rerun npm install.
Although original Bootstrap is built to work across various browsers and devices, DNR Bootstrap has limited support.
We only support recent versions of Google Chrome
This is a servere violation of our own front-end guild coding standards. We advice enforce that every project should be operational in all browsers and devices. Due to legacy code and other priorities we can only support Google Chrome for 100% accuracy.
But … more browser support is coming. it's on our backlog and bit by bit we are testing and developing DNR Bootstrap to be functional across browsers and devices.
Stay tuned because DNR Bootstrap is coming to a browser or a device near you ;-)
Start with this basic HTML template, or modify these examples. We hope you'll customize our templates and examples, adapting them to suit your needs.
Copy the HTML below to begin working with a minimal Bootstrap document.
<!DOCTYPE html>
<html lang="en">
	<head>
		<meta charset="utf-8">
		<meta http-equiv="X-UA-Compatible" content="IE=edge">
		<meta name="viewport" content="width=device-width, initial-scale=1, shrink-to-fit=no">
		<!-- The above 3 meta tags *must* come first in the head; any other head content must come *after* these tags -->
		<title>DNR Bootstrap 101 Template</title>

		<!-- DNR Bootstrap core CSS -->
		<link href="https://bootstrap-acc.dnr.persgroep.net/dist/css/dnr-bootstrap.min.css" rel="stylesheet" />
		<script src="https://bootstrap-acc.dnr.persgroep.net/dist/js/bootstrap-head.js"></script>

	</head>
	<body>
		<h1>Hello, world!</h1>

		<!-- jQuery (necessary for Bootstrap's JavaScript plugins) -->
		<script src="https://ajax.googleapis.com/ajax/libs/jquery/1.11.3/jquery.min.js"></script>
		<script>window.jQuery || document.write('<script src="../../assets/js/vendor/jquery.min.js"><\/script>')</script>
		<!-- Include all compiled plugins (below), or include individual files as needed -->
		<script src="https://bootstrap-acc.dnr.persgroep.net/dist/js/bootstrap.js"></script>
	</body>
</html>Please link to the favicons through an external url to the Bootstrap project. This way we can assure your project always has the latest version of the favicon.
<link rel="shortcut icon" href="https://bootstrap-acc.dnr.persgroep.net/dist/img/favicons/favicon.png" type="image/png" />Yes, it doesn't have to be an .ico. That's so old school. Browsers these days support other image formats. The favicons are 32x32 but will be resized by the browser to 16x16. This way they are also crisp on retina screens.
Available favicons:
 DNR:
DNR:
<link rel="shortcut icon" href="https://bootstrap-acc.dnr.persgroep.net/dist/img/favicons/favicon-dnr.png" type="image/png" />
 Author picker:
<link rel="shortcut icon" href="https://bootstrap-acc.dnr.persgroep.net/dist/img/favicons/favicon-ap.png" type="image/png" />
 Article editor:
<link rel="shortcut icon" href="https://bootstrap-acc.dnr.persgroep.net/dist/img/favicons/favicon-ae.png" type="image/png" />
 Poll editor:
<link rel="shortcut icon" href="https://bootstrap-acc.dnr.persgroep.net/dist/img/favicons/favicon-poll.png" type="image/png" />
 Live editor:
<link rel="shortcut icon" href="https://bootstrap-acc.dnr.persgroep.net/dist/img/favicons/favicon-le.png" type="image/png" />
 Photo album editor:
<link rel="shortcut icon" href="https://bootstrap-acc.dnr.persgroep.net/dist/img/favicons/favicon-pae.png" type="image/png" />
 Search:
<link rel="shortcut icon" href="https://bootstrap-acc.dnr.persgroep.net/dist/img/favicons/favicon-search.png" type="image/png" />
 Search (en):
<link rel="shortcut icon" href="https://bootstrap-acc.dnr.persgroep.net/dist/img/favicons/favicon-search-en.png" type="image/png" />
 Site Management:
<link rel="shortcut icon" href="https://bootstrap-acc.dnr.persgroep.net/dist/img/favicons/favicon-sma.png" type="image/png" />
 Workflow:
<link rel="shortcut icon" href="https://bootstrap-acc.dnr.persgroep.net/dist/img/favicons/favicon-workflow.png" type="image/png" />
When you want to show a standalone page, like imagepicker in AE or teaser editor and newsletters in the shell, you need to add .theme-xxxx modifier classes to the <html> tag and not on the <body>.
<!DOCTYPE html>
<html class="no-js theme-iframe">
	...
</html>
Basically this hides the header and removes padding on the .page-main-content. To set the class on the html tag we use the Java Spring Thymeleaf httpServletRequest utility
Let's say we want to open the imagepicker in an iframe.
First create a link and add a parameter to it.
http://imagepicker.persgroep.net/?theme=iframeNow you can access the request parameter from within Thymeleaf
<!-- Thymeleaf 2.1 -->
<html class="no-js" th:classappend="${#httpServletRequest.getParameter('theme') eq 'iframe' ? 'theme-iframe' : ''}">
	...
</html>

<!-- Thymeleaf 3.0 -->
<html class="no-js" th:classappend="${param.theme eq 'iframe' ? 'theme-iframe' : ''}">
	...
</html>
See Thymeleaf docs for more info.
Same principle for modals but this time with .theme-modal. This will hide the header and change paddings but also make the background-color of the page white
<!DOCTYPE html>
<html class="no-js theme-modal">
	...
</html>You're allowed to combine these classes.
It's safe to use <html class="no-js theme-iframe theme-modal">...</html>
As stated above, the theme-iframe and theme-modal will hide the header (with display: none;). This will still load the header but it won't show it. This is overhead on your pageload you can avoid. For performance reasons we prefer the following approach:
<!-- Thymeleaf 3.0 -->
<html class="no-js" th:classappend="${param.theme eq 'iframe' ? 'theme-iframe' : ''}">
	<head>...</head>
	<body>
		<header class="header" th:unless="${param.theme eq 'iframe'}">
			...
		</header>
		...
	</body>
</html>
This way the header will only appear in your DOM when there's no theme parameter (with value 'iframe') in the url and you will save a few bytes.
Build on the basic template above with DNR Bootstrap's many components. We encourage you to customize and adapt DNR Bootstrap to suit your individual project's needs.
Get the source code for every example below by downloading the DNR Bootstrap repository. Examples can be found in the docs/examples/ directory.
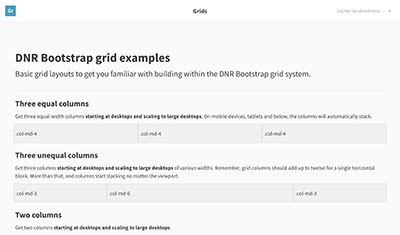
Multiple examples of grid layouts with all four tiers, nesting, and more.

Nothing but the basics: compiled CSS and JavaScript along with a container.
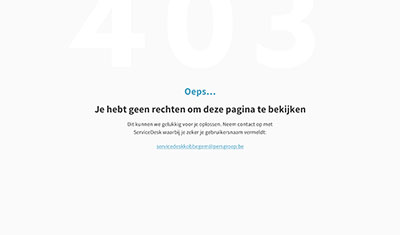
Unauthorized user
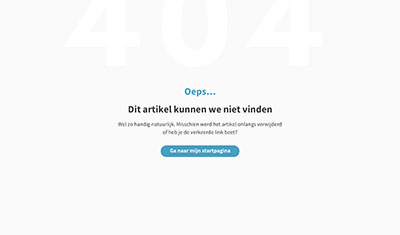
Page not found
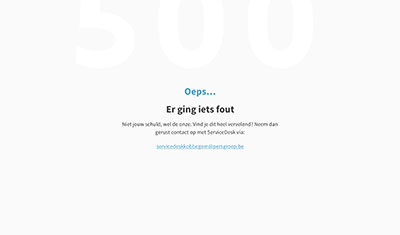
Server error